Friday, January 30, 2015

Jiffy Tomato Greenhouse Update No. 1


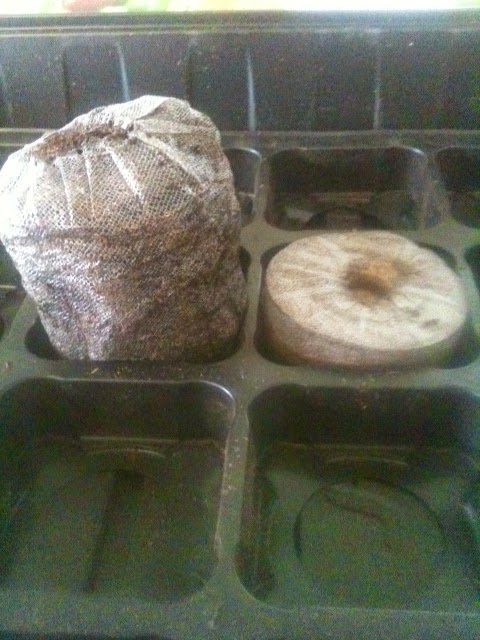
As the name entails, the tomatoes are thriving in the green house. They are sprouting tall...almost too tall as some are toppling over! I had to remove the lid of the greenhouse due to their height. Almost every pellet grew a tomato except for one!

On account of the lid being removed, the pellets are not retaining water as well. So frequent watering is required since the liquid is being evaporated so rapidly.

However, peppers are taking a tad bit longer to pop up. I peaked inside one of the pellets to see if there was any action, and the little guys are waking up. The ones that were planted two and half weeks ago are finally showing their tiny green heads, the other container planted a week ago has minimal action. Hopefully soon more will come.

So far the product has been quite successful. It works extremely well for tomatoes, I would definitely recommend this product for anyone starting those seeds. The peppers are not as prosperous yet, although I am getting some results.

I'll be continuing to update you all on my new way of starting seeds.

Spring is on the horizon, soon my little vegetable babies will be cradled in the warm soil basking in the sunlight.

Nancy Jane

Wednesday, January 28, 2015

Greens, Greens, Nothing but Greens

"Green, greens, nothing but greens: 
Parsley, peppers, cabbages and celery,
Asparagus and watercress and 
Fiddleferns and lettuce-!"
Into The Woods-Prologue


Ah, Winter Greens. Kale, Swiss Chard, Pok Choy, Collard Greens, Spinach, and so much more flourish in the cold winter months. And your color pallete is not limited to merely green, there is also purple Kale and rainbow Chard! 


The seeds are tossed into the ground while the earth is still warm in the middle of Autumn so one can continue to enjoy gardening well into winter's core. 

Often times the little plots are exploding with an excessive amount of greens, and the gardener is always left trying to find new ways to use them.

One of my favorite Winter foods is soup, and greens are a much welcomed addition to it. The best way I've found to add them in the pot is just before you serve. The leaves and stems will quickly cook up in the hot broth. Mother Judith recently made a Kale soup with chicken apple sausage and some other veggies. So delicious.


Another dish greens are great in is stir fry. Similarly with soup, wait until the rest of the veggies are cooked up then toss in the greens. Pok Choy is a must for the cuisine--make sure to include the stems! They soak in the onion and garlic flavors, which is simply divine. The last batch I made included Pok Choy and a red Swiss Chard leaf (The leaf was huge and I was only cooking for two, so one leaf sufficed).


Pok Choy stems all chopped up.
You can see the colorful stem of the Swiss Chard.
The easiest way to enjoy them is in a salad. Each leaf has a different texture and flavor that can be drowned out in other dishes; so enjoy their natural flavors while they are raw!

Do you have special ways you cook them? Please share!

Nancy Jane

Saturday, January 24, 2015

My Spray Painting Addiction


One of my Christmas gifts from the family was this cute flower pot holder! It was originally blackish gray, so Mother Judith made a suggestion to spray paint it to a spring time color to add some extra pop to my patio. I took the tip and ran with it!


Moss green was a must, however, I didn't want it to be one solid hue. While scouring the spray paint aisle lavender caught my eye! I love the way the tints mesh with the flowers.

So now an obsession (and problem) has been born, I'm always on the hunt for new items to paint.

Next project--my new lawn chairs from the 1940s. Can't wait to get to work on them!

Nancy Jane

Wednesday, January 21, 2015

Sweet Pinot Noir Pepper


You read that right, a Pinot Noir Pepper.

No it is not wine that tastes like pepper, or a pepper that tastes like wine. It's a delicious produce that all will surely enjoy! 

We grew this variety for the first time last year and the plants flourished. If you are looking to add a new pepper to your garden, you should give this one a try.

The pepper begins in a light green hue when young and matures into a variety of colors; including berry, citrus, and cherry red (though my crop mostly grew berry with a few reds). The size of the peppers vary, I had both big and small ones. If you would like to grow mostly large ones, the peppers can be thinned. 

It does very well in slightly hot weather, but as soon as it gets over 100 degrees Fahrenheit the crop slows down slightly. The peppers continued to produce well into December and only stopped because we finally got a frost!


When cooked the flavor feels hot, but does not have that spicy kick. This appeals to me since my taste buds cannot handle the spiciness. 

You can purchase the seeds at Burpee's Seeds and start them at home! 

We highly recommend this variety; it will soon become a staple in the your Summer kitchen. Pinot Noir peppers add great flavor to omelets, fajitas, quiches, pizzas, stir fries, and anything else you can think of! 

Hope you give this pepper a try! 

Nancy Jane

Monday, January 19, 2015

The Jiffy Tomato Greenhouse Review


Months ago Mother Judith remembered my dream of having a beautiful greenhouse. She granted my wish with a mini greenhouse; I thought it was so funny and so useful!


Finally seed starting time has begun for my zone (perhaps we're a little early, but we just can't wait). I am use to starting seeds in egg cartons, so I felt a bit fancy shamncy beginning my little ones in this product. Nonetheless, the mini greenhouse is great for gardeners of all levels and couldn't be easier!

Product Detail: Jiffy Tomato Greenhouse. It contains 36 peat pellets, a large plastic tray holds 36 pellets and a rectangle dome lid. The tray and lid act as the greenhouse. The peat bricks expand once soaked. You can find them at Walmart with various size options, from 25 to 70! 


First, you need to submerge the peat pellets in water for about 30 minutes in a separate container and wait for them to expand. Be sure to check the water level often; before you know it the water will be absorbed and your little pellets will not have any water left to soak in. 


When finished, you will find the peat soft and luscious; a perfect atmosphere for your little seeds to grow in. If the top of the pellets are still a little stiff and crumbly, you'll need to soak it a little longer. And the size it grows to is quite shocking compared to where it started!


After this step is done, place lose pellets back in container. Pull back netting, poke the seeds in, and cover with peat. Place the dome lid over plastic container, and wait for them to grow! I have a multitude of tomatoes growing that were only planted 5 days ago!


Here are the ups and downs I've experienced with the mini greenhouse

Upside:
  • Easy to maintain while seeds are growing. The peat keeps moisture very easily, thus minimal watering.
  • Peat keeps an optimum seed starting atmosphere.
  • Easy to tell when watering is needed; the pellets will no longer be black but light brown.
  • Minimal mess when planting. The peat does not get all over the place.
  • No extra equipment needed, all is provided for you (except seeds and containers to soak bricks in).
Downside:
  • When you place the lid on top of container for multiple days, the water does not evaporate easily and it sits in container. Fungus will begin to build up on pellets, so frequent fungicide spraying is necessary. Another remedy is to let the green house sit open to air out for a few hours.
  • Time consuming. Unlike other methods where you easily scoop soil into cartons, these take a while to prepare.
All in all, it has been a good experience using the mini greenhouse. I would recommend it for the well seasoned gardener to the first time seed starter! 

Nancy Jane

Saturday, January 17, 2015

Johnny's Seeds Herb Disk Collection


New product trial; Johnny’s Seeds Herb Disk Collection. Each disc has herb seeds of your choice strategically placed on a cloth like disc.


The disks can be purchased separately or with the proper size pot.

They offer:
  •  Cilantro/Coriander
  •  Chives
  •  Parsley
  •  Thyme
  •  Genovese Compact Improved Basil
  • Arugula
Simply place the white disc on top of seed or potting soil. 

Using the pots Johnny's Seeds sells, we fill ¾ way with potting soil, a couple inches of Burpee Brick seed starting mix, place the discs in pots, top with vermiculite, and sprinkle with more Burpee seed starter.


At Gray’s Farms we get planting fever in January, so we started ours early and keep the seeds cozy with warming mats. However, if you are in hibernation mode wait until spring to plant.

Either way, now is the time to start scouring seed catalogs for planting ideas.

Herbs not only ad to culinary creations, but work synergistically to build our health. By planting healthy products, nurturing seeds, enjoying the transformation from a little seed to a viable plant…seed starting covers mind, body, and spirit.

Mother Judith

Tuesday, January 13, 2015

Welcome Blooming Home


We weary travelers were welcomed home late at night with fresh cut flowers from the gardens.  Nancy Jane had them scattered in little spots throughout the house; each time I saw them my heart smiled.
 
For K.E.G.’s healing, traveling to clinics is needed.  The therapy is out of town and it is an intensive session of six hours a day of physical therapy…it is worth every minute—
 
But traveling during busy garden season can be disquieting. However, returning home to a counter of freshly picked tomatoes, zucchini, and crook neck squash plus surprise vases of flowers is good for a gardener's spirit.
 
Garden reunion is such a delight during the prime season.  The roses are blooming again, daisies are bursting, echinacea in pinks and whites….. yes the weeds are a bit overwhelming, but what better way to exercise after a week of watching K.E.G. workout. 

A lady I met while traveling told me in Italy they say the weeds are good for the garden…this year I am pulling that good for the garden card.
 
Winter returns from travels are just as welcoming, a fresh jar of paper whites greeted us this past trip; the pansies and violets are full of color. 
 
Fruit & nut trees are a sleep for the season, but this time of year the weeds add color; even though I know in back of my mind the hula hoe will be doing its job.
 
Traveling during garden season is not a choice I would make, but after spending so much time in the city, surrounded by homogenous malls, restaurants, and the chain stores, all cities are starting to look the same.  This confirms my life blessing of being in the most remarkable area in the world, with life growing and producing.
 
Know a traveling gardener? Nothing says home like a vase or jar full of flowers, herb, ferns, or a bouquet of precisely placed twigs.
 
Welcome Blooming Home


Mother Judith

Saturday, January 10, 2015

Invigorating Citrus Coconut Salad


Harkening to days at the warm, breezy beach, citrus coconut salad can be just as a refreshing experience. 

We are blessed to grow copious quantities of oranges and grapefruits. They're great for snacking on while out gardening, or if the ol' sweet tooth is out for something sugary.

A member of the family who really enjoys oranges is our farm dog Dutchess.

She loves to sit by Dad's side as he tosses her a few slices. In fact, if Dutchess finds herself too full, the fruit will be buried and stored away in secret for later.

Who knew a dog would find oranges so delightful?

Here is an extremely simple salad recipe we enjoy throughout the season. Mother Judith made this for Christmas Eve; it was a perfect addition to the dinner table. No measuring necessary; just add as much, or as little, as you like!

Ingredients:
  • Oranges cut in cubes
  • Grapefruit cut in cubes
  • Unsweetened Dried Coconut
Add cut citrus into medium sized bowl, stir in dried coconut and serve!


It's an excellent option for dessert, as a side dish, or as a late night sweet treat!

Nancy Jane

Thursday, January 8, 2015

Guilt Free Carrot Raisin "Cookies"


After a season of holiday eating, aren't we all looking for ways to curve the post Christmas sweet tooth? Pies, cherry delights, thumbprint cookies with strawberry jam...the list goes on. It's really amazing how much food one can manage to eat in a two day period.

Recently Mother Judith made some paleo cookies, and to my surprise they were really delicious! You almost don't miss those buttery cookies when eating them (almost, not saying you won't still crave thumbprint cookies).

If you're new to paleo cookies (like us), there is nothing to fear. They are quite delightful!

Not a bit of guilt can be found while eating these treats!

Ingredients:
  • 1 1/2 cup walnuts or almonds soaked for 6-8 hours
  • 2 cups shredded carrots
  • 10 dates, pitted
  • 1/2 cup unsweetened dried coconut, plus extra
  • 1 cup unsweetened coconut milk
  • 2 eggs
  • 3/4 cup raisins
  • 1/4 teaspoon cloves
  • 3 teaspoons cinnamon
Preheat oven to 375°. Shred carrots in food processor, set aside. 


Place soaked walnuts or almonds (drained) in food processor and shred. Add dates and blend.

Almonds after soaking
After the almonds were shredded.
Add remaining ingredients (except raisins) and mix until completely blended. Then add raisin and combine in batter.


After blending.
Using a tablespoon, scoop batter onto well greased cookie sheet. Optional, top cookies with dried coconut. Bake for 15-20 minutes, or until lightly browned.


Let cool for a bit, then serve with a hot cup of Chai Green Tea.

Nancy Jane

Monday, January 5, 2015

Lady of the Dollar Store

The Dollar Store may be the most amazing place ever.

Holiday decorations, tin pans, prune juice, battery powered candles, cookies; the store has a limitless supply of fantasticness.

Though we've had some bugaboos, such as plastic tasting cheese, we don't hold grudges.

A day came upon us that Mother Judith and I decided give the magical land our annual visit. We were walking along the frozen food and plastic kitchen utensil aisle when all the sudden a hand came upon Mother Judith. An older lady with a red wig spoke to us in a secretive tone to follow her, she needed to show us something.

Blindly we followed her down the automotive section when suddenly the crew was at a halt.

She finally revealed her secret.

"These towels are the best towels you will ever use. I made sure to call ahead to see if they had them in stock. They go so quickly!"

I looked at Mother Judith with bewilderment, neither of us knew how to react. Each of us made a pleasant remark about the towels and I reached up to grab one.

"Oh you are grabbing the wrong ones! Reach further back."

So I searched and searched until the softest white towels graced my hands. Two seemed like the perfect amount to grab. In my mind we didn't really want them, but only grabbing one seemed rude.

"You must take more!"

Before long, six fluffy white towels could be found in the basket.

The Lady proceeded to tell us her life story.

She doesn't go to church, however she has seen Jesus personally. Her niece had 13 brain surgeries which brought tears to our eyes. How she stole a rock on top of the Parthenon. She spoke of her now deceased husband. And about the leather purse her friend made her. Then the stories began to go on repeat. We just smiled and listened to her adventures.

Finally the moment of escape came upon us.

We sneaked away in an opposite direction, until she was out of sight. However, we needed to check out and that was the direction she went.

I decided to scout the grounds to see if it was safe. She was older and could not move quickly.

To my disbelief she disappeared.

Gone. Like some magical visitor, we almost thought her an Angel.

We wish to thank the Lady of the Dollar Store for sharing her precious secret; the towels are amazing. In fact, Mother Judith gave some away for Christmas gifts. We hope to see her again someday in Heaven.

You never know what will happen on your day out of shopping.


Nancy Jane & Mother Judith

Sunday, January 4, 2015

Ginger Snap's Hoarding Problem


She's adorable.

Beautiful with some brains.

Except she has a problem; the dog loves to hoard what we like to call "treasures". (Using that term loosely)

I've told the tale before, of her love to destroy all things garden. Ginger has matured a bit, but the problem still exist. Now she makes a pile of all the things she has compiled. From pie tins to mini garden shovels, frisbees to trash; that dog really makes me clean up after her mess.

So sly, you won't even notice when she grabs that pair of garden clippers you just put down for a moment.

You'll search all her normal precious stacks (yes, multiple stacks) until one day at last, you find a new heap she just created.

Shoes, balls, spoons, forks, knives, chew toys, sticks, scissors; nothing is exempt. Whatever she finds at her level she claims as hers. Finders keepers, losers weepers.

All in all, it's ok. She my sweet doggy and I love her anyway.


Nancy Jane

Friday, January 2, 2015

Potato Crust Cast Iron Quiche


There was a time I thought a quiche was not appealing. As told in the tale of pesto on a previous post, my taste buds were not very adventurous. However, to my good fortune the day came to break out of the shell! What was discovered was that a quiche is in fact delicious.

Then things changed.

I found potato crust quiches. My world was rocked, what a delicious and healthy alternative to a traditional pie crust!

Add the all time favorite chicken apple sausage and apple wood smoked gouda cheese; you find yourself with a winning combo. My fiancé loves it, we almost ate the whole thing in one night...

The first time the recipe was made I used a traditional pie pan, the second a cast iron skillet. With the cast iron skillet the potatoes were crisper, however, the pie pan works great too.

Part 1-the Crust:
  • 3-4 red potatoes skinned and sliced
  • 2 tablespoons olive oil
  • 1 tablespoon garlic salt
  • 1 teaspoon pepper
Preheat oven to 425°F. Grease cast iron skillet or pie pan, set aside. Place sliced potatoes in mixing bowl, add olive oil, garlic salt, and pepper and mix. Layer on pan like a crust, it's ok to overlap layers, cover large gaps.


Place in oven and bake for 25 minutes, or until lightly browned.


Part 2-the Filling
  • 4 eggs
  • 1/2 cup of half and half
  • 1 cup shredded apple wood smoked gouda cheese
  • 2 cups of diced sausage
  • 1/4 cup diced onions
  • Salt and pepper
Combine ingredients in mixing bowl. I don't use too much salt in the filling since there is plenty on the crust. When potatoes are finished, pull out of oven. Pour egg mixture over potatoes, some of it might seep onto the pan. This is fine, it will still bake nicely.


Lower oven temperature to 350° F, bake around 20 minutes or until set. Then serve warm!


After you enjoy the quiche and have leftover to store for later, the quiche easily scoops out of the skillet.

Hope you love this dish as much as we did!

Nancy Jane