Showing posts with label Health. Show all posts

Thursday, January 8, 2015

Guilt Free Carrot Raisin "Cookies"


After a season of holiday eating, aren't we all looking for ways to curve the post Christmas sweet tooth? Pies, cherry delights, thumbprint cookies with strawberry jam...the list goes on. It's really amazing how much food one can manage to eat in a two day period.

Recently Mother Judith made some paleo cookies, and to my surprise they were really delicious! You almost don't miss those buttery cookies when eating them (almost, not saying you won't still crave thumbprint cookies).

If you're new to paleo cookies (like us), there is nothing to fear. They are quite delightful!

Not a bit of guilt can be found while eating these treats!

Ingredients:
  • 1 1/2 cup walnuts or almonds soaked for 6-8 hours
  • 2 cups shredded carrots
  • 10 dates, pitted
  • 1/2 cup unsweetened dried coconut, plus extra
  • 1 cup unsweetened coconut milk
  • 2 eggs
  • 3/4 cup raisins
  • 1/4 teaspoon cloves
  • 3 teaspoons cinnamon
Preheat oven to 375°. Shred carrots in food processor, set aside. 


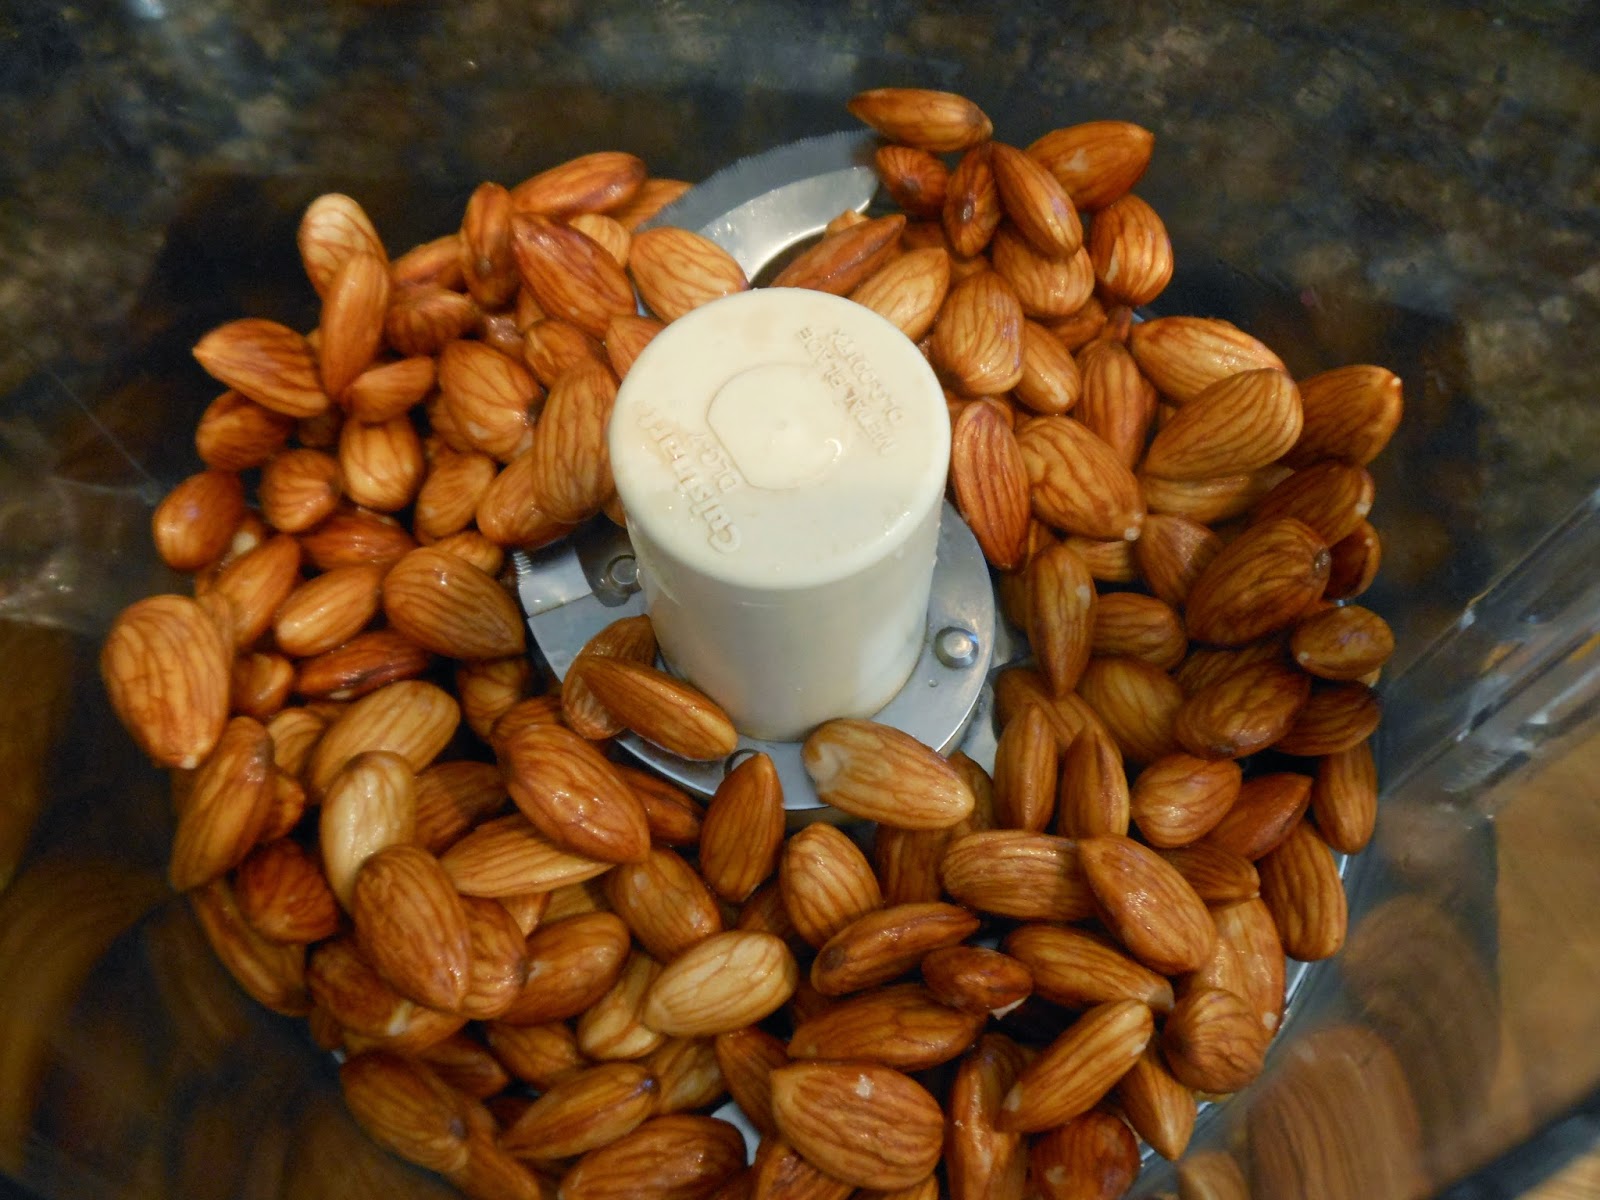
Place soaked walnuts or almonds (drained) in food processor and shred. Add dates and blend.

Almonds after soaking
After the almonds were shredded.
Add remaining ingredients (except raisins) and mix until completely blended. Then add raisin and combine in batter.


After blending.
Using a tablespoon, scoop batter onto well greased cookie sheet. Optional, top cookies with dried coconut. Bake for 15-20 minutes, or until lightly browned.


Let cool for a bit, then serve with a hot cup of Chai Green Tea.

Nancy Jane

Sunday, September 7, 2014

Toasting Sesame Seeds


Toasting Sesame seeds is not a must, but adds a pack of flavor along with its already nutritional boost. We purchase them in bulk and keep toasted seeds on hand for salads, stir fries, breads and steamed vegetables.

To toast them, cover the bottom of a frying pan with seeds (we use cast iron), turn on the burner and stir the seeds until golden brown. You can always roast on a cookie sheet also, however, we prefer the skillet so we can keep our eyes posted on the little seeds; they burn quickly!


Be sure to add sesame seeds to your healthy kitchen's pantry.


Mother Judith


Monday, June 30, 2014

Multigrain Pumpkin Seed Bread

 
Homemade Bread with fresh produce is great remedy after a long travel.  
As I frequently say, use your bread machine—especially with travel lag.
The nutty flavor of the pumpkin seeds, combined with multi-grain says "Welcome home-so glad you are back for real food".
 
Makes 1 ½ pound loaf
  • 1 ¼ cups water
  • 2 Tablespoons butter-softened
  • 1 1/3 cups white bread flour
  • 1 1/3 cups whole wheat flower
  • 1 cup multi-grain cereal (uncooked) I use Trader Joes brand
  • 3 Tablespoons packed brown sugar
  • 1 ¼ teaspoons salt
  • 3 teaspoons regular active dry yeast.
  • ¼ cup pumpkin seeds (we use sprouted)
Place ingredients in order except for pumpkin seeds in bread maker bread pan.
Process in bread machine according to machine’s  directions.
You can bake completely in your machine---but I always have the machine mix and raise the dough, before baking I take out the dough divide it in two and place in standard size bread pans. 


Let it rise until doubled, bake a 350 degrees for 30 minutes.
Option: brush dough with egg wash and sprinkle with pumpkin seed before baking.


Mother Judith

Tuesday, May 27, 2014

Sweet Barbequed Cinnamon Carrots


Cinnamon and carrots, a healthy match made in heaven. The natural sugar content of the carrots blend perfectly with the cinnamon creating a delightfuly sweet dish! Meat eaters and bunnies alike will love this dish.
 
In early spring I planted these fun tri colored carrots. Since today was my last harvest of the crop I decided to make Sweet Barbequed Cinnamon Carrots.
 

Ingredients:
  • Four cups of chopped carrots
  • 1 tablespoon olive oil
  • 1 teaspoon of cinnamon
  • Foil 
Place chopped carrots in bowl, add olive oil and cinnamon. Mix together.
 
 
Place carrots in a foot length of foil. Wrap foil completely around carrots.


Place on Barbeque with burners set on medium-high. Barbeque for 20-25 minutes on top shelf, or until carrots are slightly soft.
 
 
Once barbequed, remove and enjoy! Serve hot or cold.


Serve in a cute mason jar, or on a platter. Eat alone or enjoy on top of steaks, chicken, and even hamburgers! It's also a fantastic addition to a leafy green salad. So incredibly healthy and tasty, it is sure to be a hit! 

Nancy Jane

Wednesday, May 14, 2014

Bring Out the Piccolos for this Berryific Jicama Salad

 
Berryific Jicama Salad is the essence of late spring turning into summer, fresh and full of wild flavors! The berries can be interchangeable, but I had 5lbs of blueberries to use up and a ton of blackberries from our patch. The berries were begging to be used.

Ingredients:
  • 4 cups of Jicama, peeled and chopped (You can find it at your local grocery store)
  • 2 cups of Blackberries, whole
  • 1 cups of Blueberries, whole
Pour all ingredients in a large container, stir together. And it's that easy!

You can add to top of leafy salads, or eat alone. I've been eating it to help me get over a sugar fix. What's nice about the jicama is it absorbs the berry flavor without losing its spirit and crunch. The salad adds a brightness and extra nutrition to your meals, truly berryific!

Bring it to a Memorial day or 4th of July party to add naturally patriotic colors to the table. Its the John Philip Sousa of the salad world-I can just hear the Stars and Stripes Forever piccolo solo when I look at it.
 
On top of my leafy greens, and chicken. Delicious!
 
So colorful! So patriotic!
 
Nancy Jane

Monday, May 12, 2014

Fabulous Fig Walnut Bars

 
 Two ingredients; that's all you need for this recipe. Extremely healthy, and are great for solving sugar cravings, although sometimes I end up eating all the delicious bars...
 
The Lord has blessed us with naturally sugary treats!
 
What you need:
  • 15 dried figs (I found a giant bag at Costco for a relatively good price)
  • 1/2 cup unchopped walnuts
  • Blender
Step One: Place the figs on cutting board and cut off tips. Place in blender.

Dried figs are not that visually appealing...


Step Two: Turn on blender between 1 minute to 1 minute and 30 seconds, depending on dryness of figs. Every fruit and machine is different, you will see it's ready when is clumps up into a ball.

 
Step Three: Add walnuts and blend for 10-20 seconds, or until walnuts are desired size.


Step Four: Take out wax paper. Place 1 heaping tablespoon on wax paper. Or another option is to stick it all on a piece of wax paper to make a cake. Either way works well.

 
Wrap paper around fig walnut mixture. Leave room for mixture expansion inside the paper. Be sure to watch out for fig walnut mixture trying to escape out of wax paper!


Take a rolling pin, and roll cake flat. Make sure to firmly press down to make the mixture pack tightly.
 
 
Open up, and viola! You've got a bar! You can wrap it back up in the wax paper, and easily store them all in a Ziploc. Makes about 7 bars, you can also cut them in half for trouble free eating.
 
 
All wrapped up!

 
Super easy! You can easily see how fabulous these bars are!

Nancy Jane

Wednesday, May 7, 2014

Splendid Blood Orange Olive Oil Quinoa Salad

The hint of orange mingles perfectly with jicama, bell peppers, and snow peas. The key to this salad is to let it set over night. The flavors will grow, along with its sweet aroma. Easy to make, and can be prepared in steps. You can cook the Quinoa one day and cut the veggies another. Nothing strenuous about this recipe.

I purchased the Blood Orange Olive Oil from the Temecula Olive Oil Company. It's a sweet and delicate oil. The aroma is very pleasant. Here is the link to the oil.

Ingredients:
  • 1 cup uncooked Quinoa
  • 2 1/2 tablespoon Blood Orange Olive Oil
  • 1 cup diced jicama
  • 1 cup diced bell peppers
  • 1 cup sliced snow Peas
Step 1: Cook Quinoa as directed on package. Let cool.
Step 2: Stir veggies together in a large bowl.
Jicama

Bell Peppers

Snow Peas

 
Step 3: Add Quinoa to veggies and stir. Add orange olive oil, stir. Let the salad sit over night, serve next day.


You will be thrilled by the delicate flavor, and the bright colors of the veggies add some visual pizzazz to the food.

Nancy Jane 

Monday, April 28, 2014

Rockstar Barbequed Fries


During the long hot days of Summer, the last thing the cook wants to do is warm up the house with the oven! However, this family enjoys our burgers with a nice side of potato goodness. To solve this battle of either warming up the house to have fries, or keep the house cool and have no fries, we use the barbeque. It becomes an essential cooking tool in the Gray household.

These healthy fries are simple to make, however they do take a while to cook. It takes around an hour for them to finish, but it's well worth the wait. They can be barbequed by themselves or simultaneously with a steak or burger. You do not need to babysit the fries while they are cooking. Just turn on the timer and work on other project!

This recipe is for a party of four. Feel free to add or reduce the amount of potatoes and spice.

*side note* It calls for red potatoes, but we found purple and white potatoes at Costco, so we included them in this batch.

What you need:
  • 5 Red Potatoes (or any other potato about the size of a fist)
  • 2 tablespoons olive oil (another option is garlic olive oil-it adds extra flavor to the dish)
  • 1/2 teaspoon garlic salt
  • 1/4 teaspoon pepper
  • Foil (non stick works best)
  • Barbeque
"Preheat" the barbeque, turning burners on to medium. Cut potatoes into desired size, put in bowl. Add olive oil, garlic salt, and pepper, stir until potatoes are well covered.


Take 10-12 inches of foil and place on countertop. If you do not have non-stick foil, be sure to spray it with Pam.

Pour potatoes on foil.


Keep potatoes in the middle of foil. Add another piece of foil on top, fold sides TIGHTLY! This step is so so important. You will be flipping over the foil and you want to make sure the potatoes don't spill out.


Open barbeque, carefully put potatoes on top shelf and close lid. Let cook for 20 minutes.


After 20 minutes are up, cautiously lift lid. If it has been closed for full 20 min, there will be a wave of heat. Using a spatula, place the foil covered potatoes on bottom shelf and flip over. I use tongs to help out. Place back on top shelf with spatula. Cook for another 20 minutes. After that time is up, flip again using the same process. Open the top layer of foil with tongs and let cook opened for another 15-20 minutes.

 
Grab some ketchup, and enjoy!


A great part of the recipe is the potatoes will absorb the taste of the well seasoned barbeque. I prefer this recipe over oven roasted fries because of this. I am looking forward to making these all through the barbeque season! 
 
Nancy Jane